The Queue Module will enable App Admins to manage multiple Queues in their apps.
This module requires a Twilio account in order to send SMS notifications
For instance, each queue can be for a different purpose, service and/or location, a use case can be
in a financial institution, where there is a Queue for opening a new account, another queue for
mortgages, another for insurance, etcetera.
App admins can add unlimited queues and App Admins can move users up and down the
Queue and delete and add users to any Queue.
This module works well for managing at a granular level the amount of people that can be
waiting in a queue. For instance, some establishments have constraints due to space or due to
security protocols where there is a limited number of individuals allowed to be waiting in line
for a service.
This module will help App Admins manage the mechanization of Queues by establishing
precedence among users and automating the notifications as they get closer to the top of the
Queue. Without having the users to be physically present at the location, until the time has
come for them to report to X location.
Users receive SMS and push notifications when there is activity in the queue, for example,
when they are moved to a new position, when they are deleted, or send back to the end of the
queue. With this feature, users do not need to wait in line to move forward. Let us say that they
are number 40, and they can go and run other errands and get come back to the establishment
when they are number 5, for example.
App Admins can add reasons to communicate to users why they were moved or deleted from
the Queues.
The module has a yearly subscription of 299€/year. As with all Siberian licenses, this is valid for
one URL domain/platform and Unlimited Apps.
User Manual
First select the “Queue Module” from your “Features” tab. Once you have selected your “Queue Module” you will want to configure its settings.
Let’s start with “Manage Queues” and select that tab first. When you are first presented with this tab you do not have any queues listed. You will need to create a new queue by selecting the “Add new Queue” button. Once this is selected you will give your queue a title and a description. The title will be visible at the top of your app when you are in this queue.
![]()
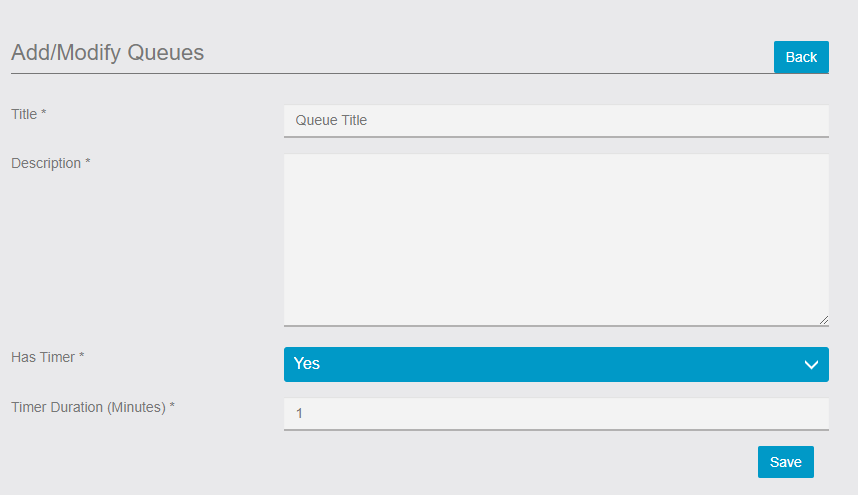
You also have the option to add a timer to your queue. Please note that the timer will countdown and rotate the person from the top of the queue to the bottom. This is helpful if you are using the queue for a salesperson queue. If you add a timer you will see that there is a duration section, after this duration has expired the rotation will occur and the timer will restart on the next person in line.
Once you have setup your queue can add users in the “Customers/Admins” Settings of the module (which we will get to in a minute). Moving onto the next settings tab titled ”Customers Queue” you can select a queue from the list of queues you currently have.

Once the queue is selected it will provide you with a list of users in the queue, the position they are, their email, the user id, and a time to when they will be at the first position. You can also see from this tab the current amount of time remaining for this queues timer.
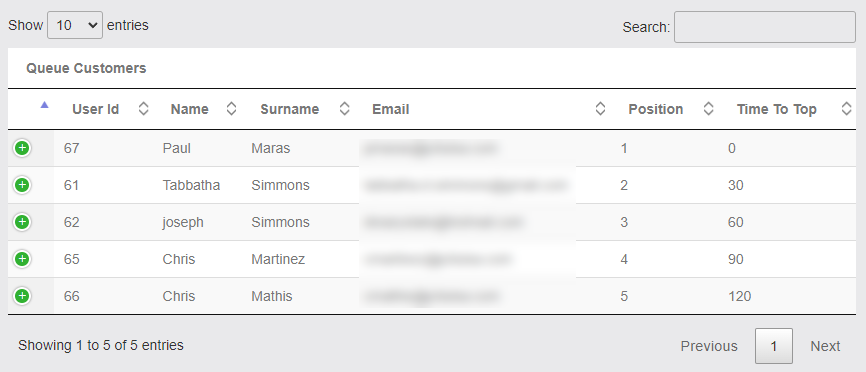
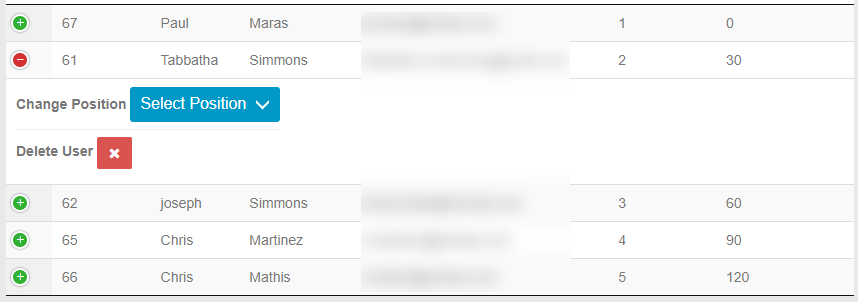
You can click the green button to the right of any user and either delete the user from the queue or change their position.
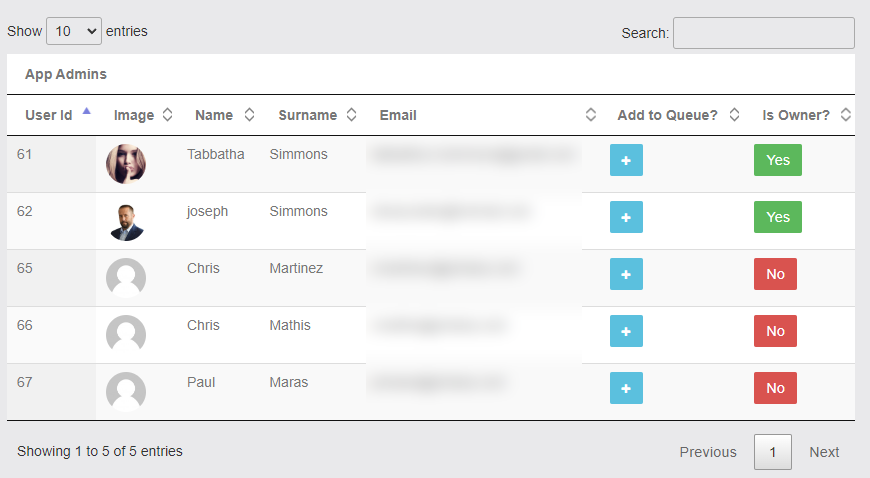
The third tab titled “Customers/Admins’ lists all current users that available in your app. From here you can add them to a queue or make them a owner (admin) of a queue.
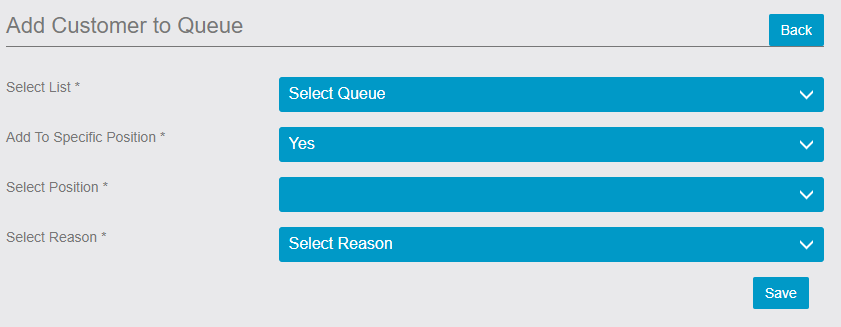
If you click the ![]() button under “Add to Queue?” you will presented with a screen that asks which queue to add this user to and if they need to be in a specific position? If they do need to be in a specific position you will be provided with another prompt asking for a position number as well as the reason they are going into this position.
button under “Add to Queue?” you will presented with a screen that asks which queue to add this user to and if they need to be in a specific position? If they do need to be in a specific position you will be provided with another prompt asking for a position number as well as the reason they are going into this position.
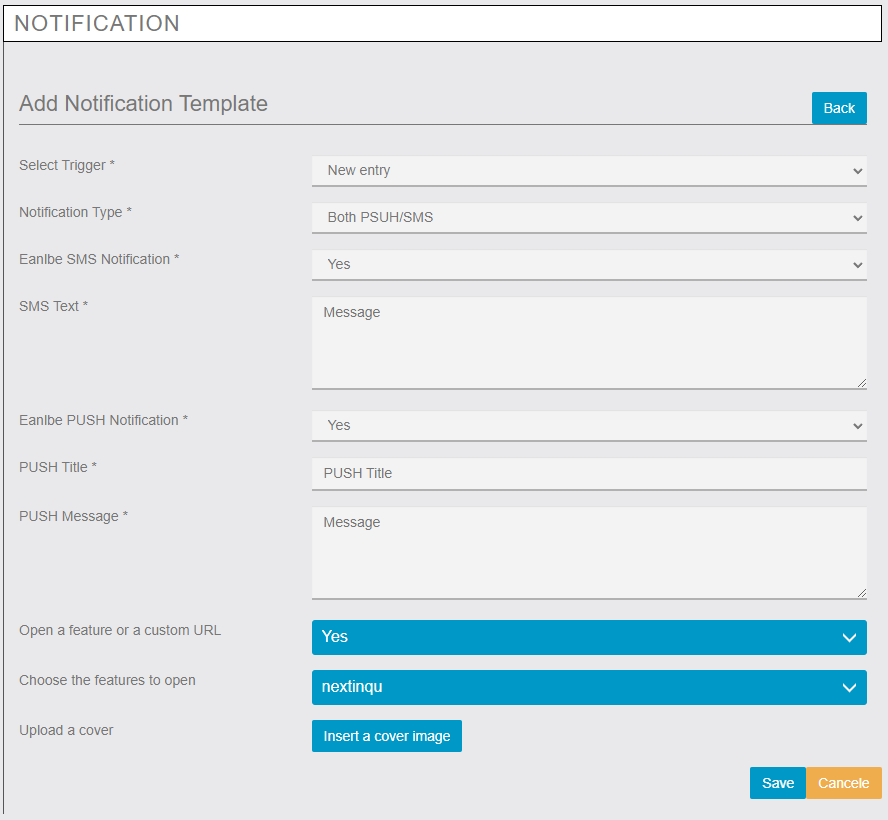
Moving onto the 4th tab titled “Notifications”, this tab will be where you set up notifications for your queues as well as view log files of previous notifications. To create a new notification template (templates are what sends the notifications) click the “Add Notification Template” button ![]() and it will bring you to the screen shown below.
and it will bring you to the screen shown below.
The following is an explanation of each section in detail as this can be the hardest part of the settings to manage.
Select Trigger – You can pick from the lists of events that will trigger a notification to be sent. The triggers are:
- Reached position to 1,2,3 – This event will send a notification to any user that has entered into any one of these 3 positions in the queue (position 1 is top of list/queue, position 2 is second in line, and position 3 is third in line.)
- Rotate to bottom – as this event suggests it will trigger a notification to be sent to any user that was in position 1 (1st) and has been rotated to the bottom of the queue after the timer has ended.
- Removed from list – this event will trigger a notification to be sent to any user that is removed from the queue.
Next, we have “Notification Type”, this allows you to setup notifications as push notifications or SMS/text notifications or a combination of the two.
“Enable SMS Notification” is a simple toggle to enable or disable SMS notifications, this feature is also available with the “Enable PUSH Notification” toggle that enables or disables push notifications. We have provided the option for both types of notifications because we understand not all apps will be native.
“SMS Text” and “Push Message” are setup the same way. You type what you would like the message to say and in place of the user’s name you will use @@name@@ and in place of the position number you will use @@position@@. I have provided an example screenshot of this typed out. When you select “Reached position to 1,2,3” this example will popup. This is the format used to identify the user and position that is being sent in the notification.

“Push Title” is the title header provided for the push notification.
“Open a feature or a custom URL” which you will be asked to choose a feature of the app or a URL if you have chosen “Yes” that it will direct the user to.
“Upload a cover” allows you to upload a cover image for your notification to be sent. Keep in mind that sending a image via SMS may cost you more.
The next tab in our list is “APP Settings”, if you are using SMS, we have made it very easy to setup. All you need is your Twilio Auth Token, Twilio SID, and Twilio SIM ID. Copy and paste these from your Twilio account and your set. The time zone feature is self-explanatory, make sure the app has the right time zone so it can log and send SMS/Push notifications at the correct time.
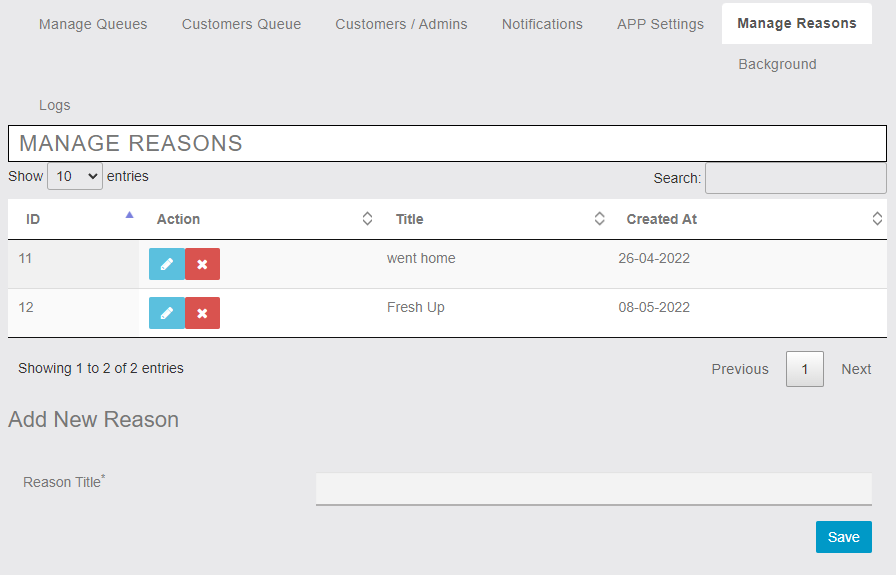
Lastly, we have the “Reasons” tab. You can setup “reasons” that people are added or removed from the queue, they might be going to lunch, they might be with a customer, they might have been removed by accident, etc. Once you add a reason you will have access to them from the app and the Backoffice.